
Spec-Driven Development in Practice: Building a CSG Modeler with Coding Agents
Spec-Driven Development in Practice
AI coding agents have made it cheap to produce code. Checking their work still takes effort: is the code correct, and does it do what you intended? That gap is where spec-driven development earns its keep.
Spec-driven development (SDD) means writing the specification first and steering with it. The benefits I care about:
- Control. I review the intended change before the agent implements it.
- Less context decay. The spec stays there for the agent to re-read, instead of intent evaporating twenty messages back.
- Intent fidelity. What you meant survives the trip into the code.
I pair it with behavior-driven development (BDD). The scenarios give me a way to describe and review the expected behavior, and steer the tests the agent writes.
The specification is only the start. You still have to make changes, collect evidence, and correct the record when reality disagrees. That takes guardrails, adversarial review, and a human stepping in at the right moments.
For anything with a UI, the evidence has to include screenshots you ask the agent to examine. Those catch drift that ordinary automated tests sail past. My project critic also uses mutation testing to challenge weak tests.
How I got here
I have spent a few years on this. It started with toy interpreters and compilers written for the joy of it; two Scheme compilers ended up self-hosting on the QBE backend. Then came my own coding agents. I haven’t written those up, but they taught me how agents use tools, and the sandboxing they demanded became AI Fortress. I did write up one long autonomous run: a Ralph loop driving Claude Code through a computer algebra system.
Lately it has been games. Return Vector is a space shoot-’em-up; Grandmaster’s Gambit is a chess game with its own engine. I built both in Godot with Claude Code, Cursor, and OpenSpec.
A worked example: a CSG modeler in the browser
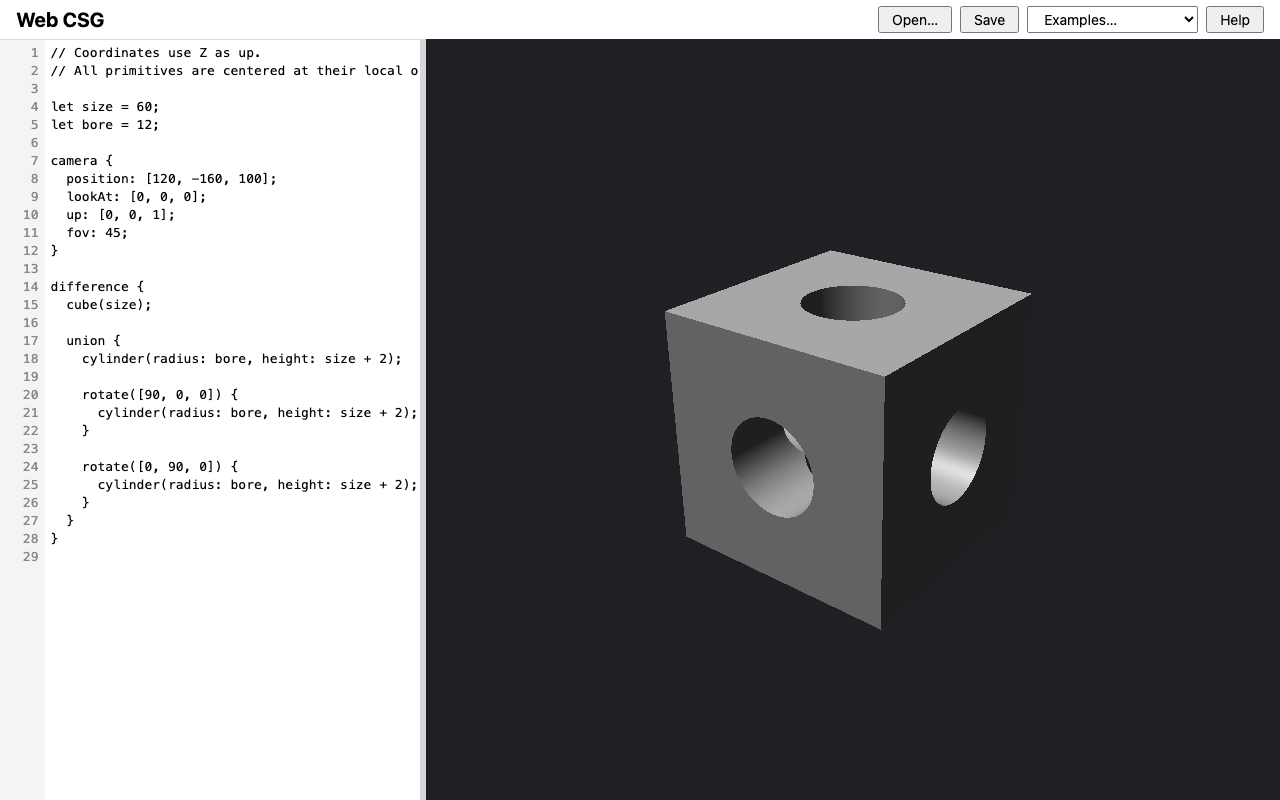
I wanted something visual, easy to explain, and serious work to build by hand. I landed on a tiny CSG (constructive solid geometry) modeler in pure JavaScript.
Start with a vision document
I wrote vision.md first, as specifically as I could: purpose, goals, constraints, and requirements. I drafted it from scratch, bounced ideas off ChatGPT, revised a few times, and committed it. You can read the first full draft.
Then came the scaffolding: a design template, ROADMAP.md, GLOSSARY.md, CLAUDE.md, and the project-critic skill I keep iterating on. The critic reviews from a fresh context and returns [APPROVED] or [REJECTED].
I set up OpenSpec for its propose, apply, and archive cycle. Each change holds a proposal, requirements deltas, a design, and tasks. Then I added an /interview-me skill, inspired by Matt Pocock’s /grill-me (skills repo) but tailored to my project structure and templates.
Let the agent interrogate you
The interview skill asked about fifteen questions to clear up gaps in the vision, then filled out DESIGN.md, ROADMAP.md, and CONSTRAINTS.md (commit).
It settled thirteen decisions, with the stack, core boundary, and test gates recorded in CONSTRAINTS.md. The choices that shaped everything after:
- Rendering: a pure JavaScript CPU ray tracer drawing to a 2D canvas, with no Three.js and no WebGL.
- Core purity: parsing, evaluation, and ray tracing never touch browser APIs, so they run under Node for tests.
- Tests: Node’s built-in runner plus comparison against committed reference images, with Playwright on Chromium, Firefox, and WebKit.
- Git: one branch per OpenSpec change, merged into main only after the full test run passes and the critic approves.
More valuable: it called me out on my own conflicting statements. The vision said the app used Three.js while also specifying a CPU ray tracer. It listed camera controls in the editor when the camera is set in source. It mentioned “marching limits” for a renderer that does analytic intersection and never marches. All three changed in vision.md, before any code existed.
Every feature in DESIGN.md has acceptance scenarios for the tests to trace back to. Here’s an evaluator scenario:
Scenario: The vision example is valid
  Given the bored-cube source from vision.md
  When it is evaluated
  Then there are no diagnostics
  And the model is a cube of size 60 minus the union of three cylinders of radius 12 and height 62
It also left things open on purpose. The tolerance ε and supported scene scale stayed provisional until a milestone could test them. Module layout waited for the first OpenSpec proposals, and parked features stayed parked. A spec that pretends to know everything on day one is lying to you.
The roadmap gives you shippable slices
| Milestone | Goal |
|---|---|
| M0 | Foundations: the project can verify itself |
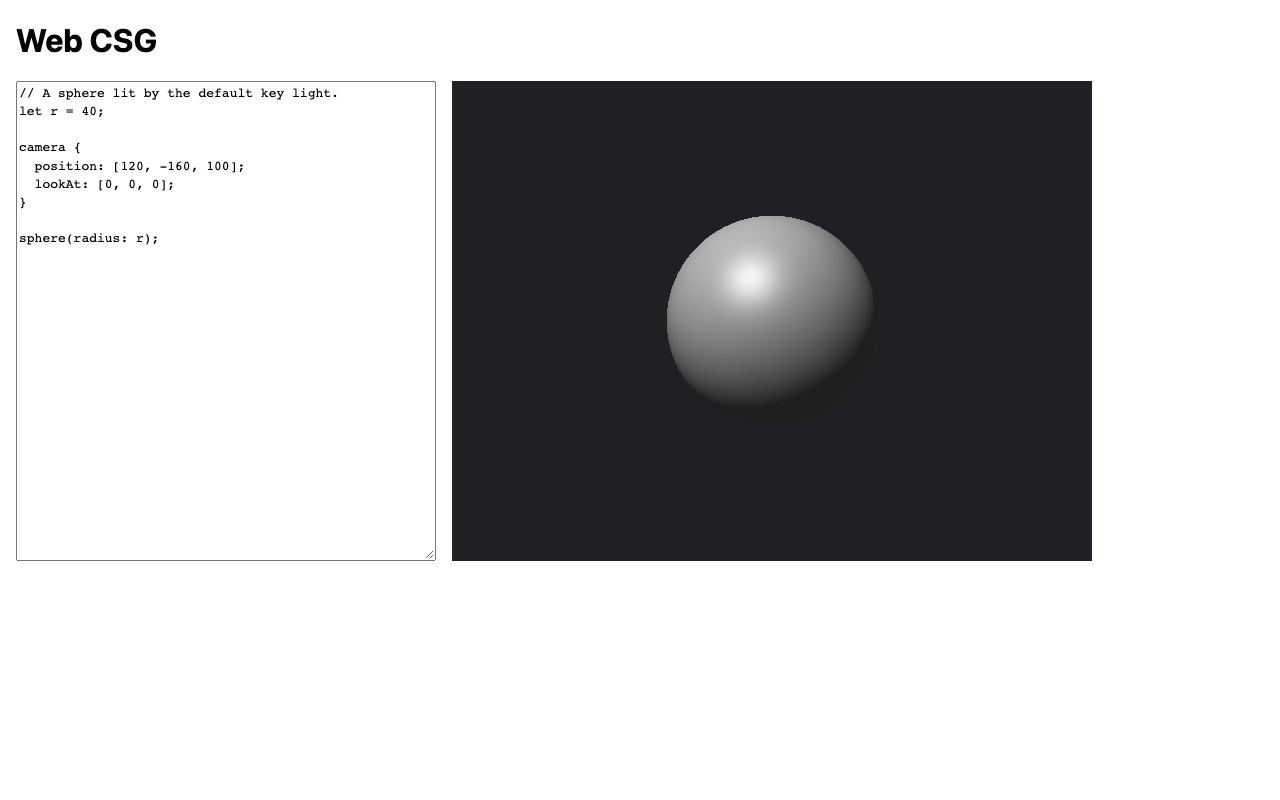
| M1 | First pixels: a sphere from source text reaches the canvas through the real pipeline |
| M2 | Language and feedback: diagnostics, stale preview, responsive rendering |
| M3 | Primitives and transforms |
| M4 | CSG: Boolean operations; the bored cube renders |
| M5 | Lighting and material |
| M6 | Persistence and examples: first release |
Give the agent a map
CLAUDE.md points to DESIGN.md for behavior, CONSTRAINTS.md for rules and gates, and ROADMAP.md for milestones. It names npm run check as the verification gate and keeps browser APIs out of src/core/.
Then ship, one milestone at a time
From there the OpenSpec loop ran over and over: propose, apply, archive. The first one landed a slice of M0:
M0: add verification tooling, dev server, and placeholder page
Add package.json (Node >=22, @playwright/test 1.63.0 pinned), the zero-dependency dev server, PPM golden-image support with deliberate regeneration, Playwright e2e on Chromium/Firefox/WebKit, milestone capture, and a versioned pre-commit hook.
Verification tooling landed before any feature did. That ordering is what M0 is for.
Two lessons have held up across my projects.
Some verification comes back to you, and that is fine. Here that meant checking real Safari myself, while Playwright automated Chromium, Firefox, and its WebKit build. I could have deferred it, but I wanted to look at the UI regularly anyway.
Permission mode matters. You need auto permission mode in Claude Code, or another setup where you’re comfortable letting the agent commit repeatedly to a branch. Otherwise you spend the time you hoped to save babysitting approval prompts.
Make it gather visual evidence
Ask the agent to capture the milestone’s visible behavior, save the screenshots under docs/progress/<milestone>/, and compare them with the acceptance scenarios. That prompt gets it to look more closely, even between my own reviews.
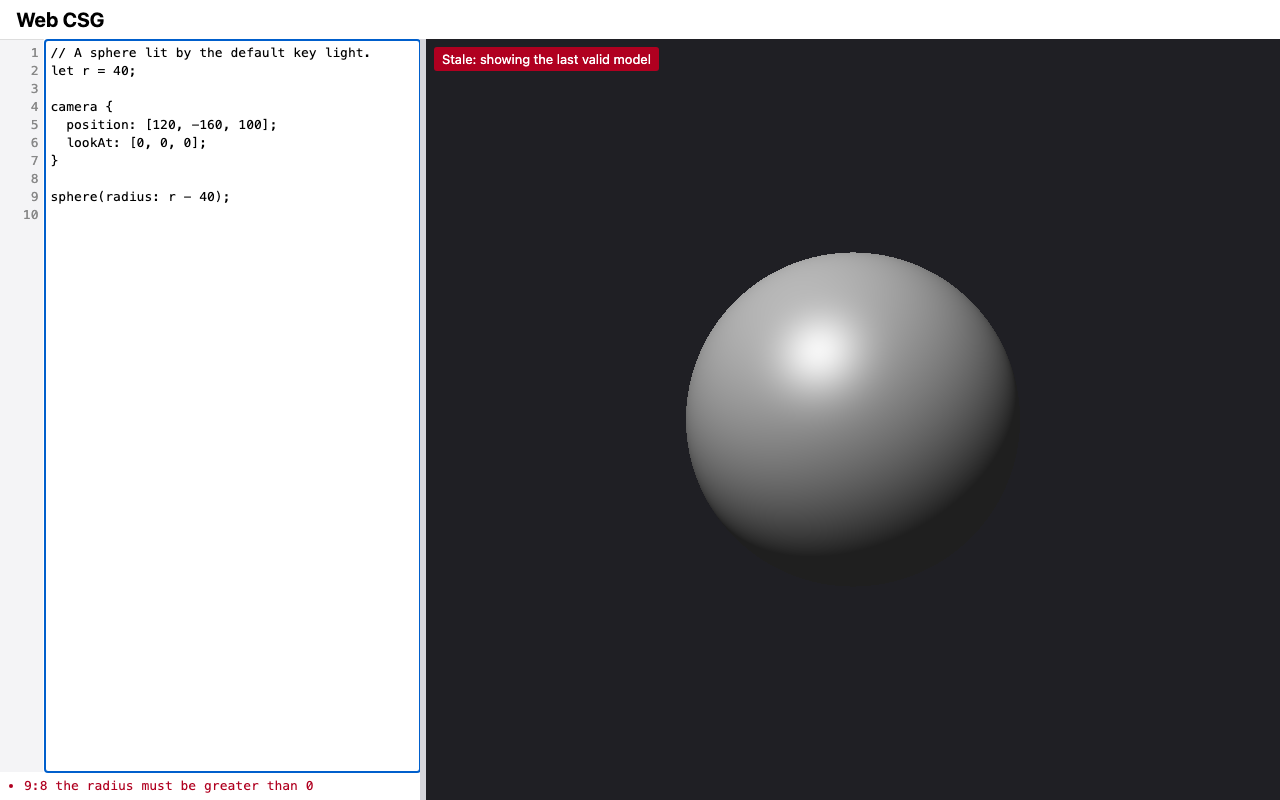
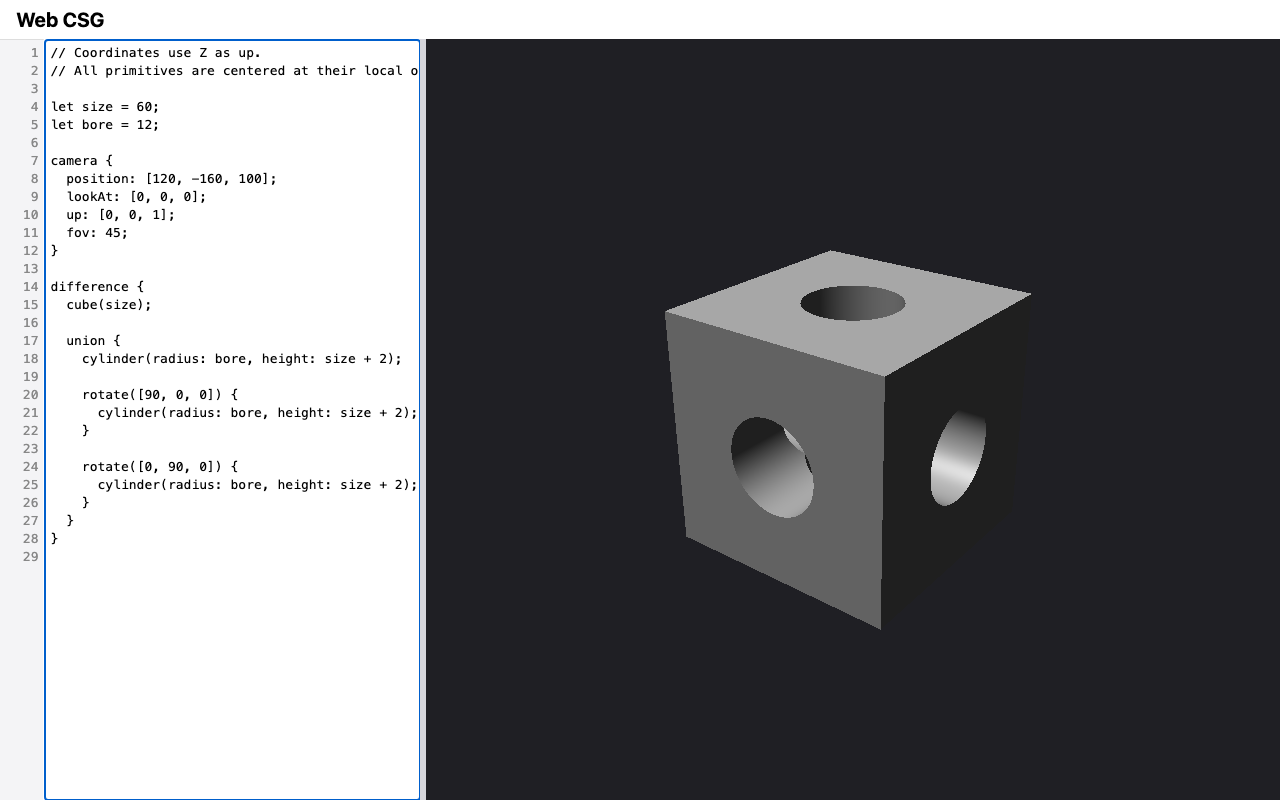
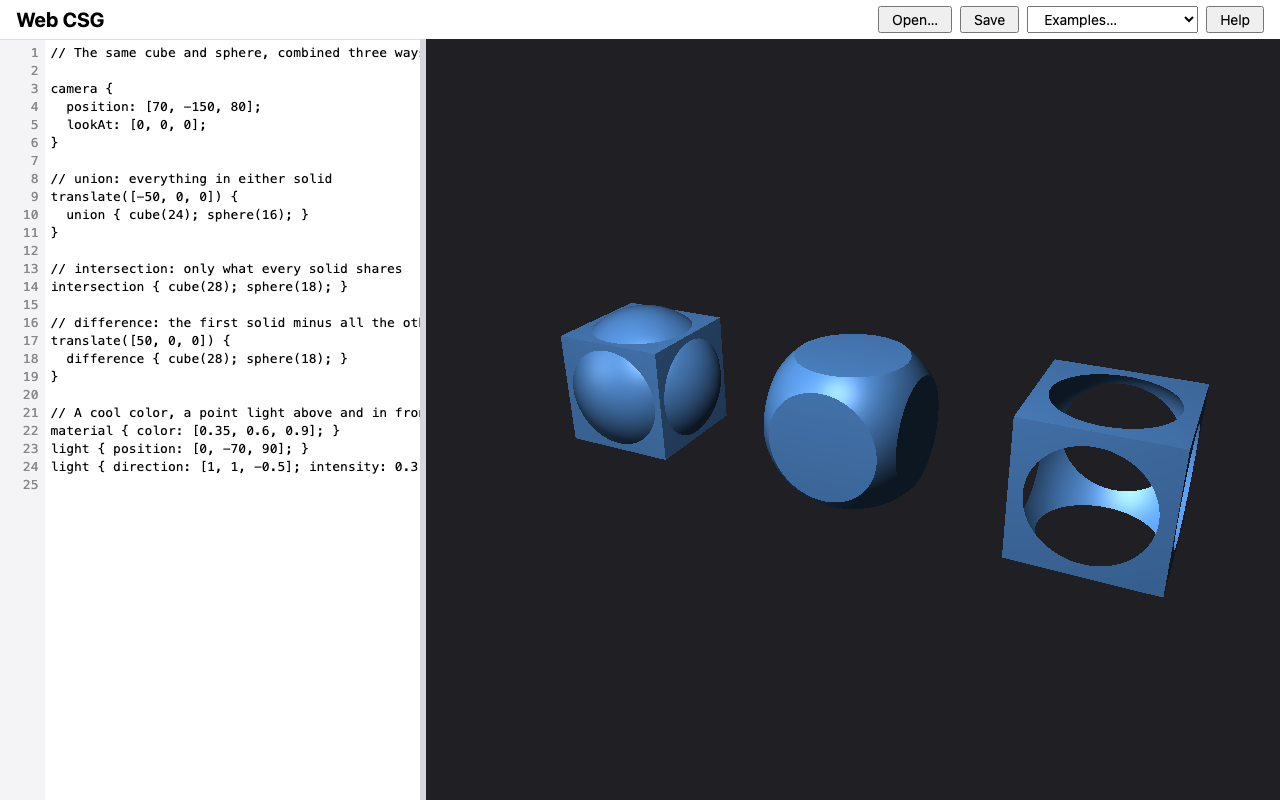
The captured screenshots and the agent’s own verification write-up for the final milestone are in the repo.
The critic earns its keep, then overstays
The project-critic skill I use is aggressive. It reviews without repairing the implementation, so the evidence stays available. It reads the diff, runs the test gate itself, and judges the result against the project’s design documents and constraints.
In an isolated copy, it changes or reverts the behavior an assertion depends on. Then it checks that the test fails for the intended reason. It costs time and tokens, and relentlessly pursues edge cases and ambiguities. Here that meant ray intersections. What tolerance counts as a tangent? What happens when intersections fall close together during a Boolean operation?
Later rounds can turn into lawyerly nitpicking over the wording of a requirement versus a test. Mutation testing also turns up corner cases where the code isn’t broken but the critic judges the test insufficient. This project went six rounds or more; on others I now cap it around four. At the cap, I decide which remaining issues to accept or put in the backlog. If you review everything anyway, keep the rounds few and save them for major milestones. If you let the agent run unattended, the extra round is cheap insurance.
The result
At M6, 321 Node tests and 171 Playwright checks were green, but the first critic pass still rejected the release. It found a CRLF normalization bug, a BOM-related caret-offset bug, and two behaviors the tests failed to protect. After the fixes, 323 Node tests and 180 Playwright checks passed, and the second critic round approved the milestone.
The project took 78 commits: 48 the first day, 25 the second, and 5 at cleanup a few days later, while I mostly focused on other work.
You can play with the finished modeler at csg.ranton.org, and read the whole history at github.com/ranton256/web_csg. After setup, work moved milestone by milestone, with follow-up commits for fixes, review evidence, and archiving.
There’s room for mouse picking, interactive camera controls, WebGL acceleration, and more primitives and materials. I kept the scope small enough to explain and substantial enough to test the process.
The flow I actually use
The same loop works beyond this project:
vision → interview → design + roadmap → OpenSpec delta → apply → evidence → critic → archive
- Define the vision. Write a
vision.md(or a PR/FAQ) stating the problem, objectives, scope, and non-goals. - Interview for ambiguity. Have the agent question conflicts, missing decisions, and assumptions before they harden into code.
- Establish the design and roadmap. Put architecture and behavior in
DESIGN.md, milestones with measurable outcomes inROADMAP.md, the stack, boundaries, gates, and service targets inCONSTRAINTS.md, and shared terms inGLOSSARY.md. - Propose an OpenSpec delta. Keep the change’s requirements, Gherkin scenarios, design decisions, and tasks together. The roadmap covers the larger goals.
- Apply the change. Let the agent implement it, updating the documents when the work exposes a decision that needs to change.
- Gather evidence. Run the automated gates and keep reproducible results. For visual work, capture and inspect the result too.
- Run the critic. Review the diff and working software against
DESIGN.md,CONSTRAINTS.md, and the relevant OpenSpec requirements from a fresh context. Challenge weak tests and iterate until the critic approves or you decide to stop. - Archive the change. Merge the delta into the source of truth after the checks pass and review is settled. Keep the evidence with its milestone so later drift is visible.
Here is where I step in. I set the scope, resolve ambiguous design decisions, and inspect the visuals and behavior in a real browser at least once per milestone. I review the critic’s findings and decide when to stop the rounds. I also make the final call on releasing.
What I have cut
I’ve cut back on three parts of the process.
A separate task tracker alongside OpenSpec gave me a modest improvement for a lot more time and tokens. OpenSpec already tracks the tasks inside a change, and the roadmap covers the larger goals. A third system duplicates both.
Full-fledged domain-driven design (DDD) added more ceremony than I found useful here. I kept GLOSSARY.md, which does most of what I need to cut confusion.
Adversarial review can get out of hand. For routine work I use the agents’ built-in code-review skills. I save the full critic for major milestones and larger, riskier changes.
Prior art
- OpenSpec uses propose, apply, and archive, with an optional explore step in front. Its artifacts can be revised without rigid phase gates.
- Spec Kit uses a more sequential core workflow: Specify, Plan, Tasks, Implement, then Converge the implementation against the earlier artifacts.
- BMAD sizes its process to the work: a well-defined change can go straight from
bmad-spectobmad-build, while larger epics and projects add planning artifacts and repeat the same build unit. - Kiro builds requirements, design, and tasks into its IDE, CLI, and web product, with feature, bug-fix, and quick-spec variants.
From CSG to games
A one-screen ray tracer is a forgiving place to learn this. Games add real-time loops, physics, asset pipelines, and 3D scenes, with more ways for an agent to drift. Each adds something you have to specify and check.
I use that progression in AI Spec-Driven Game Development, a course teaching this same loop through games. They’re fun to build, easy to demo, and make good portfolio pieces.
The six guided projects start with a browser puzzle, an arcade game, and a C game on my own 2D engine. Then it’s Godot: 2D, 2.5D, and a 3D cart racer. You finish with a capstone of your own. Along the way you use Claude Code, Cursor, and OpenSpec. You write Gherkin scenarios, generate assets with AI tools, and gather evidence that the game does what you specified.
No deep computer science background is required. The course page has the full project descriptions.